Soul & Solace March 2018

Sailing to the North Star

Wherever we are our faith voyage, contemplating who we are now and who we hope to be provides us a North Star. But what about all that stuff that impedes our sailing?

As we consider what flotsam and jetsam need to be cleared away, it’s tempting to drop anchor and stare dismally at all our floating crud. Though the point is the voyage, not the impediments, it’s easy to get trapped berating ourselves for our crud. Is there any source of help when we’re weighed down with regret?

There is: and it’s all around us. H2O. Good old water.

This month, we invite you to refresh yourself with God’s gift of H2O. Possibilities are

  • Take a sip. Pour water into a clear glass and notice its clarity. Sip and let the water sit on your tongue. Swallow and envision the water replenishing your tissues and hydrating your skin.
  • Take a shower or bath. As the water cleanses, notice how it also refreshes. Cool water invigorates; warm water soothes. Soak it in. Literally.
  • Perk up a plant. Water a house plant, garden, or lawn. Note how droplets sit on leaves and petals, magnifying their structures: a universe revealed within a single droplet.
  • Do the dishes. It’s a homely and wholesome practice to occasionally wash dishes by hand. Life is often nebulous and confusing. Transforming a grimy plate into one sparkling clean and stacking it away for use another time—that’s a soul metaphor we can all appreciate.

Water is a treasure available (for now) in abundance. This month we hope you let it work its restorative magic in your soul. Water smooths our sailing, wherever our soul may voyage.

How do you move through guilt on your soul voyage? We’d love to read your thoughts.

Soul & Solace February 2018

Getting Down and Getting Real

A well-intentioned speaker recently promoted volunteerism as a cure for depression. As a person who has, throughout my lifetime, struggled with what Winston Churchill called “the black dog,” and who volunteers regularly, I wanted to offer a different perspective: the possibility of living with depression as spiritual practice. And the same goes for volunteering.

Depression. Depression does not represent a lack of strength or a flaw of character. It’s a treatable condition. One that some pretty awesome people have shared, including Winston Churchill, Martin Luther, John Bunyan, and Howard Butt—founder of the HEB grocery chain and Laity Lodge. And, while potentially devastating, depression can actually be an opportunity. We learn to know ourselves deeply, to practice self-care, and to accept others’ in their woundedness. I would be pleased to visit with you further about the challenge of depression, if you wish.

Volunteering. How can volunteering be a spiritual practice? We can…

  • Stand in another’s shoes. Imagine living through a day as a person with whom you volunteer. If that person is in a wheelchair, how does he get to appointments? How does she prepare meals or practice good hygiene? What does the world look like from his eye level?
  • Get real. Actually loving someone—when they’re cranky or despondent or ungrateful—challenges us to clear away our rose-colored glasses version of what it means to love. Acting for the good of another takes (and promotes) clear spiritual vision.
  • Pre-feed our souls. Volunteering can taste great for the volunteer. But if that’s our sole reason for volunteering, we’re out the minute the cuisine goes stale. And where does that leave the person we’re volunteering with? Instead, we feed our souls before volunteering (because we all need and deserve it), then share from the abundance.
  • Connect face to face. Looking a person in the eye, listening with our full attention is a powerful gift. Fair warning: it also makes us vulnerable. But seeing another—and being seen by another— reminds us that we’re all human and we’re all connected.

What are your thoughts on depression? On volunteering? We’d love to read your thoughts.

Soul & Solace January 2018

It’s a fresh year. We’ve begun it here in Austin with a snapping chill in the air—and with flurries of snow. The days are shorter, the nights longer. Perfect for reflection and anticipation.

My new year’s reflections landed on a snippet of a psalm: “I will solve my riddle to the music of a harp (Ps. 49:2).” The line struck me like a gust of winter wind. “Yes!” I said through chattering teeth: “That’s why A Spacious Place exists. It’s our hope for each person!” So, with our best hopes for you in 2018, here are some ideas for your soul’s riddle solving.

  • Ask. What question presses on your soul as you begin 2018? You might have a whole fleet of questions. Flesh them out in the shape of written words. Look at what you’ve written: these are the riddles of your soul. They’re yours to solve—in tandem with your highest allegiance. Take a long, pondering look.
  • Create. Once you’ve fleshed out your riddles(s), apply a bracing dose of creativity. Harp music was the natural expression for our psalmist. Writing’s my native tongue: longhand with a pen whose ink flows onto the page. Yours might be sewing or painting or cooking or doodling. Find what works for you. Then paint or plant or plait your riddle. Let your creative work ask the hard questions. Honesty’s the only way to solve your soul riddle.
  • Wait. Last, give yourself some grace and your puzzling some time. Riddle solving’s a process: processes take a while. You may greet 2019 still puzzling this one out. But, once you’ve set your riddle to a tune uniquely yours, you’ll be attuned to its solving throughout the year: as the days grow longer and warmer, and then snap back to bracing cold.

The delight of a riddle is in the work of its solving. We, at A Spacious Place, wish for you in 2018 a year such challenge and eventual delight.

How do you solve the riddle of your soul? We’d love to read your thoughts.

Halloween Creativity 2017

At A Spacious Place we believe in creating in community, because the sharing of ideas and feedback helps the creative process. Last Sunday night, friends of A Spacious Place gathered to carve pumpkins, decorate calaveras (sugar skulls), and share a meal. We cheered one another’s creations, laughed at the stories shared, and enjoyed the food offerings. Below are some of our calaveras and our pumpkins that lit the night on Halloween. Enjoy them as much as we enjoyed making them.

Gutting the pumpkin…                                          Time to carve your ideas into its skin


Here are the final results

           Woodstock singing                                                         Creepy face

Ghostly face                                                “Ruh-roh, Raggy!”

Snoopy howling “Aroooo”


And calveras galore


We hope that you had a fun, safe Halloween, and that your spooky creating time was enjoyable.

Young Artist’s Club: The Bayeux Tapestry

The Bayeux Tapestry is a truly fascinating piece of both history and art.   Created around 1070 AD (really!) and nearly 230 feet long (yes really!!), it is an embroidered tapestry that depicts the Norman conquest of England.  If you’re interested in learning more I highly recommend this YouTube video explaining the tapestry in further detail (it’s meant for school groups so there’s also some excellent attempts at grade-school humor, haha).

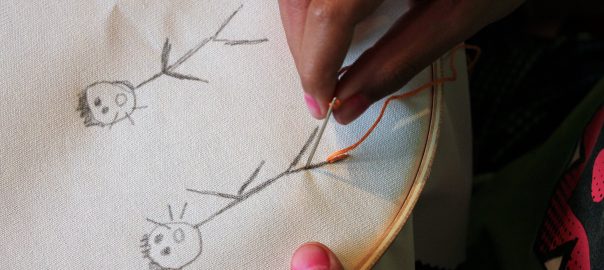
So what did our Young Artist’s Club do to explore the Bayeux Tapestry?  Well a whole lot of embroidery, naturally!

We also did some other fabric art, including making no-sew pillows out of t-shirts, and decorating cloth duffle bags.

Finally, our club members drew their own history-inspired tapestries on long sheets of paper; they could do as many scenes as they wanted since the papers were so long!

I think this was an incredibly interesting piece to learn about; I can’t recommend the above YouTube video enough.

If you’re in the Austin area and want to join our Young Artist’s Club you totally should!  Check out our website for info on the next meeting!

What We’re Making: Mondrian-Inspired Art

Who doesn’t love them some Mondrian!  I’ve always loved the bold, primary colors and structure of his pieces.

Recently we did a Mondrian-inspired art project with our groups.  We used markers and crayons with one group, and watercolors with another.  The project can be adapted to each group’s interests and needs.

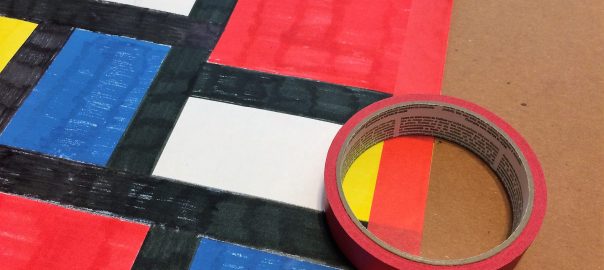
Start with a large piece of white paper and some blue painters tape.  Use the painters tape to mark off different size rectangles all over your paper.  If you cut the ends with scissors it will help keep your lines nicely crisp when we start adding color.

Once you’re satisfied with your grid layout, starting coloring in the rectangles!  Use yellow, red, and blue to stay true to the Mondrian roots of the activity.

Once you’ve colored as many rectangles as you’d like, take a black marker and trace along the edges of the painters tape.  Then peel off the painters tape.

With black marker, fill in the spaces left by the removed tape.  A ruler will help you keep the lines straight.

And you’re done!  You can use primary-colored tape around the edges of your art to form a border if you like, or leave it as it is.

Check out some of the pieces our participants made!

The world needs more bright, bold art in it; I hope this has inspired you to make some!

Young Artist’s Club: JB and Kel Brown

At this Young Artist’s Club we explored the work of some local artists: twin brothers JB and Kel Brown.  JB is a hip-hop artist; Kel is a painter.  But they work together, music influencing painting and vice versa.  Not only did our members get to learn about these awesome local artists, but we also explored the collaborative power of music and art.

(If you’re interested in more info on the Brown brothers, you can check out this great interview, or this really neat video.)

To start the day, we decorated maracas, and made rainsticks:

Then, in the spirit of the Brown brothers, we collaborated on some guitar designs:

We took a quick snack break (keeping with our musical theme):

Then each member got to design their own album cover while listening to the music of their choice.  They had to choose what music to listen to during their creative process, whether they’d do a realistic or abstract piece for their album cover, and then what medium to use.

Our club members loved the connection they got from learning about artists in their own city.  It was a very empowering Saturday!

Want to join us?  There’s more info on our Young Artist’s Club on our website.

Hopefully you’ll come create with us soon!

What We’re Making: Statue of Liberty Costumes and July 4th Rockets

Last month we did a couple of July 4th crafts with our groups, making red, white, and blue rockets and Statue of Liberty costumes.  Our participants really love anything they can dress up in, so these were a real hit.

Before we get into the How-To, let’s get some tips from Kaye!

  • For the Statue of Liberty costumes our participants made their own crowns and torches, but we provided the green drape and tablet to complete the look.
  • In advance we cut out the crown shapes and drew in rectangles to simulate windows.  If time for this craft is limited you can even glue down the cones in advance and the participants can just paint the outsides.
  • Because the paper cones are wax coated the paint beads up a bit on the waxed surface, which looks like oxidation.  You can even talk about how metal oxidizes if your group would be interested in that!
  • We also pre-cut the paper arcs and strips for the torches, to save time.
  • For the July 4th rockets, we cut paper tubes into 6″ lengths ahead of time, but you could do any size.
  • Adding the netting and ribbon before gluing on the rocket’s cap worked best.

Let’s get to making!

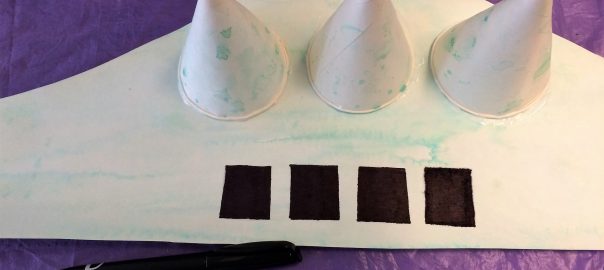
For the Statue of Liberty crown, each participant gets  a pre-cut paper crown and three paper cones.  Have then paint these with a light green watercolor.  Let dry.

Once dry, color in the pre-drawn windows with a black marker.

Run liquid glue along the bottom edges of the three paper cones, then glue onto the paper crown as shown:

Once the glue is dry, wrap the crown around your head and staple it in back to fit.  You can even add a strip of paper as an extender if you need the crown to be bigger.

For the Statue of Liberty torch, take a pre-cut green paper arc and roll it into a cone shape.  Staple the edge to hold this shape.

On a long strip of green paper create a design for the top of your torch.  Then wrap it around the top of your paper cone and staple it in place.

Create flames by gluing red, yellow, and orange strips of paper (tissue paper works well for this) to the inside edge of your torch.

Finally, don the provided drape and grab the tablet and strike your best Statue of Liberty pose!

We made the July 4th rockets during the times that the watercolor and glue needed to dry on our Statue of Liberty costumes.  Here’s how we made them:

Take a paper tube and decorate it with colored tape.

Using clear tape, attached ribbons and strips of netting to the inside of one end of the tube.  These will be the streamers at the end of your rocket to show it’s in flight.

Next, take a pre-cut paper disk (just a paper circle with a slit cut half-way into it) and fold it into a slight cone shape.  Staple this in place to hold its shape.

Run a bead of glue along the un-adorned end of the paper tube.  Set the paper cone on top and press gently so the glue adheres.

Once the glue is dry, poke one end of an ornament hanger through the cone.  Use it to hang up your rocket like it’s flying!

Here’s to celebrating Lady Liberty!

What We’re Making: Hot Air Balloons

Another 3-dimensional craft!  These hot air balloons are such a fun group activity since they involve drawing, spatial reasoning, and those fun, tactile, cotton-ball clouds.

If you’re doing this with a group, you’ll probably want to get the hot air balloons and foam cut out ahead of time.  To prep:

  • Trace your hot air balloon shapes onto posterboard and cut them out, two for each participant.
  • Each participant will get one shape that’s cut from the top down, and another shape that’s cut from the bottom up (see pictures below).  When cutting the slits, cut slightly longer than half way in each direction. This will simplify assembly.
  • Then take floral foam (about 1″ thick) and cut it into circles with a cleaned out can, biscuit-cutter, or round cookie cutter.

Now you’re ready to bring on the participants!

First, instruct them to draw on both sides of both of their balloon cut outs.  It’ll all be visible once it’s assembled because it’s 3-D!

Then, show them how to line up the slits so that the shapes stand up.  You can get into how they’re standing perpendicular to each other, or at right angles to each other if you like.

Next, holding the bottom of the balloon firmly, push it into the floral foam circle.  Since floral foam is much softer than Styrofoam they should go right in.  If not you may need to use a pen, scissors, or a craft knife to score the foam first.

Now ask the participants to gently pull apart some cotton balls to make them look more like clouds.  Have them use liquid glue (glue sticks don’t really work for this) to attach the cotton to the floral foam.

And that’s it!  What a whimsical piece, right?  Our participants really liked to imagine the balloons are flying; ask them where they’re flying to! 🙂

Happy making!

What We’re Making: Mexican Star Ornaments

Another of our art projects last month was making Mexican Star Ornaments.  This is a neat combination of a coloring craft and a paper-folding craft, so make sure to leave time after all the coloring is done to give instructions on the folding and assembling part.

But first, some tips from our fearless leader, Kaye!

  • I found a template for a six-pointed 3-D star, then added the interior star and tabs to fold under at the tips.  The tabs especially help to keep the 3-D shape once everything is assembled.
  • I punched a small hole in one tip and added a loop of thread to act as a hanger ahead of time.  I also folded under the tabs.  You wouldn’t need to do this for some groups. Just know your peeps. 🙂
  • I printed the stars onto cardstock, so we did the coloring portion with colored pencils, because markers can weaken the paper.
  • The streamers are strips of plastic tablecover.  You could also use strips of tissue paper, ribbon, or really anything colorful and flow-y you can think of!

Here’s the star template itself:


Once you’ve printed out your star onto cardstock, let’s get to making!

First, cut out the star template from the cardstock.  Punch a hole in one tip of the star and add the loop of thread that will be the ornament’s hanger.

Now the hard part (ha, not really!): pick what colors to use!  Color your star however you choose, pastel, neon, the colors of your room, whatever you like!

Once you’ve finished coloring, it’s time to start folding.

Start by folding and then unfolding along all of the dotted lines.  After you’ve pre-folded everything your star should be flat on the table again.

Now start folding the long lines up toward you, and the short lines down away from you.  The long lines will poke up like mountains, and the short lines will point down like valleys.

Next, flip your star over.  Glue little streamers to each tip of the star (except the one that has the thread loop for a hanger already).

For the final touch, fold those flaps on the edges back over the tip to encase the streamer.  Where the flaps overlap glue them together.  This will help the star to keep its 3-D shape.

Now your star ornament is done and ready to hang!  I like how Kaye has hers in a window, it looks so festival with all of the sunlight.

And here are our fellow artists in action!

Wouldn’t a few of these strung together in a garland look so neat?  You could alternate them with your papel picado!

Happy creating everyone!