Wearable gifts are always a hit at Gifted2Give, and who doesn’t love the incredible versatility of duct tape? Add in all of the neat patterns you can find it in and we’re in gift-customizing heaven. 🙂
Here’s how to make a duct tape belt!
First, some tips:
- It helps to have a long table for laying out the belts.
- Also, keep fingernail polish on hand to clean the scissors, since the duct-tape glue gunks them up.
You’ll need:
- Various cool patterns of duct tape (camo, sports teams, and animals prints always go over well)
- 1 1/2″ D rings for the large belts (we get a variety of silver, gold, and nickel)
- Binder rings for the small belts (these only come in silver, I think)
- A long strip of posterboard 1 1/2″ wide, to act as a sizer
- Scissors
- Pens
Wrap the posterboard sizer around your waist to get a measure of how long to make the belt.
Keeping your finger on the right spot on the sizer, lay it out on the table. Stretch a piece of duct tape to that length plus six inches. Stretch out another piece the same length.
Carefully match up both pieces of tape, sticky-side to sticky-side, until you have one long piece of duct tape with the design on both sides and no sticky-side showing.

Since the duct tape is 2″ wide, and the D-rings are only 1 1/2″, you’ll need to cut the tape down to the narrower size. Lay the sizer on top of the belt, and trace the edge with the pen. Then use the scissors to cut the edges off the belt.


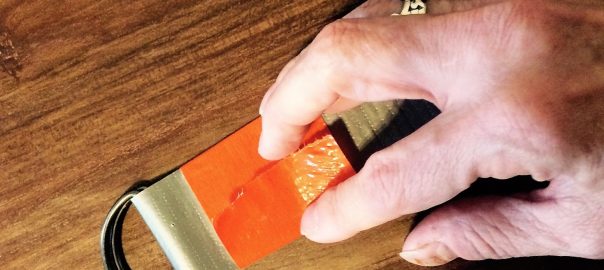
Now take two D rings and slide them over one of the ends of the belt. Fold the end of the belt over the D rings and tape it to secure the rings in place. You can use either the same pattern of duct tape for this, or a different color or pattern for a cool contrast effect.


**Want to make a thinner belt? Using only one strip of tape, fold it length-wise in thirds, then use the binder rings instead of the D-rings.**

Now you can wear your belt! What colors and patterns would you use for a duct tape belt? Or what colors and patterns would you use for a duct tape belt gift?