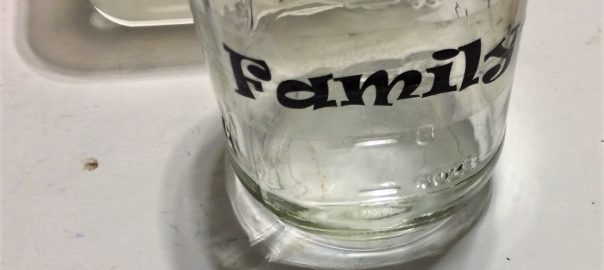
Another fun gift-worthy craft! We made this at last year’s Gifted2Give event with winter holiday gift-giving in mind, but as there’s always a fun holiday coming up they can really be a year-round activity. Valentine’s gift, perhaps? 🙂
First, a few tips from Kaye!
- To get the labels off of the glass jars, I discovered that soaking them in hot, soapy water for a day helped get off most of the labels. With the really stubborn ones, I followed up with a paste of baking soda and vinegar, and with even more stubborn ones I used fingernail polish remover. Some just were too hard to remove, so don’t feel bad if you try and try and one or two still won’t fully come off! Just use the other ones.
- Rounded sides on jars made adhesion more difficult, because the transfer can’t lie flat. If you can find more flat-sided jars, use those!
- When making the transfers, soak, remove the paper, and let dry sticky-side-up for a few minutes. Once dry, the tape will become sticky again.
- You’ll need to print your chosen words using a laser printer, as the inkjet printing process doesn’t allow the ink to be separated from the paper with this method.
Let’s get started!
- Choose the word you would like to put on your jar. We printed out words like Family, Love, Peace, and Gratitude. You can go serious or funny with your words/phrases, or you could use the recipient’s name, too.
- Print your words and phrases using a laser printer.
- Cover your printed words with clear packing tape. Try to cover each word with just one piece of tape so you don’t have any seams in your final label.
- Using your thumbnail or the back of a spoon, burnish the tape firmly all over the word. You want the tape to be as completely and firmly adhered to the paper as possible.
- Cut out your word or words, leaving a border around the edges. The shape of tape that you cut out in this step is the shape that the final label will be, so keep that in mind.
- Choose the jar you’d like to label. Make sure the word you chose fits on the jar!
- Fill a small bowl or plastic container halfway with water. Submerge your word fully in the water for 1.5-2 minutes. The entire strip of paper needs to be fully submerged the whole time.
- Remove the paper from the water and begin to rub the paper-backing off of the tape. If it doesn’t all come off you can soak in the water again until you can rub all of the paper off.
- Once all of the paper is removed, lay the label sticky-side-up on a paper towel. Let dry three minutes so the tape will regain its tack.
- Once its dry, apply your custom label to your jar! Smooth out any bubbles with your finger.
- For added decoration you can tie a ribbon around the neck of the jar, or glue some along the edge of the jar lid. Now your jar is ready to gift!
These would be so fun to fill with homemade bath salts, or cookie mix, or a bunch of new colored pencils, or a bunch of fun notes to your giftee… Anything you think they would like! What word would you put on a jar as a gift? What would you put inside it? It’s so fun brainstorming what your loved ones would like as a gift, isn’t it?


