Tag Archives: drawing

What We’re Making: Hot Air Balloons

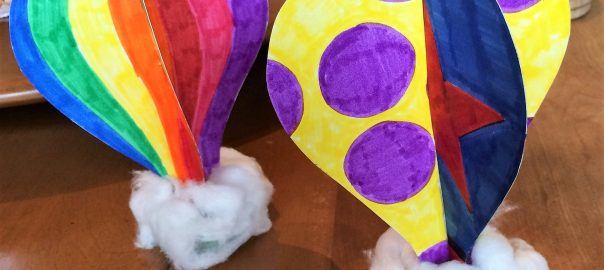
Another 3-dimensional craft!  These hot air balloons are such a fun group activity since they involve drawing, spatial reasoning, and those fun, tactile, cotton-ball clouds.

If you’re doing this with a group, you’ll probably want to get the hot air balloons and foam cut out ahead of time.  To prep:

  • Trace your hot air balloon shapes onto posterboard and cut them out, two for each participant.
  • Each participant will get one shape that’s cut from the top down, and another shape that’s cut from the bottom up (see pictures below).  When cutting the slits, cut slightly longer than half way in each direction. This will simplify assembly.
  • Then take floral foam (about 1″ thick) and cut it into circles with a cleaned out can, biscuit-cutter, or round cookie cutter.

Now you’re ready to bring on the participants!

First, instruct them to draw on both sides of both of their balloon cut outs.  It’ll all be visible once it’s assembled because it’s 3-D!

Then, show them how to line up the slits so that the shapes stand up.  You can get into how they’re standing perpendicular to each other, or at right angles to each other if you like.

Next, holding the bottom of the balloon firmly, push it into the floral foam circle.  Since floral foam is much softer than Styrofoam they should go right in.  If not you may need to use a pen, scissors, or a craft knife to score the foam first.

Now ask the participants to gently pull apart some cotton balls to make them look more like clouds.  Have them use liquid glue (glue sticks don’t really work for this) to attach the cotton to the floral foam.

And that’s it!  What a whimsical piece, right?  Our participants really liked to imagine the balloons are flying; ask them where they’re flying to! 🙂

Happy making!
What We’re Making: Silly Faces Books

Did you have one of those “Learn to Draw Cartoons” books growing up?  I remember my brother had one and loved it.  (Incidentally, he works as an artist for video games now!)

01b93e6ef7b8523d3b2a67821c68e29afbc6b09f12-2

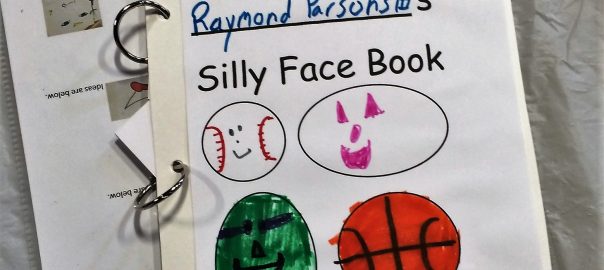
Earlier this month Kaye pre-made these wonderful Silly Faces books for our participants to draw in and on.  It was just a simple front cover of posterboard, three internal pages cut horizontally into thirds, and a back cover of posterboard.  She said they would really work best if you have a binding machine; we used binder rings, which worked well enough, but the pages dangled a bit.

0188be7ae294d73716018dafb7f5906eddced13860-2 0192859e5157bf29ca9852d9b004fa62bc2538fa25-2

Kaye put examples of different cartoon eyes, noses, and mouths out on the tables for participants to reference.  Then she instructed them to open their books, and draw what ever eyes, nose, and mouth they wanted on their first page.  Then they all turned those strips to the next page and drew another set of eyes, nose, and mouth.  Finally they drew more features on the last page of their books.

01c96fe8fe1b67514fb66cc1666b9af9899ed987dd-2 013753879f70f6a4dce5c85193f9a431b3b7c5c022-2 01244e8255a974fe8479de80d2c3b5cc49192c83d3-2

Of course the point of cutting the pages horizontally is to mix and match the faces around in fun ways!  Our participants loved changing up the faces, as well as learning simple cartooning techniques.

0152a261972297c81bae5e0110bda816e720c32c02-2 01101727ec26b1f24f12e35bc7c9e836328ad6a3d2-2

This is one of those nice activities, too, that participants can really add to after our initial art period.  They could decorate the covers, or add more face pages!

012b0eeab0333c8ead6dc82b8b1c5d2bf8ef82d64e-2 01e9550887122942b26e20d9ad7b5dde02aedc4871-2

Have you ever tried drawing cartoon faces?  A book like this would be a fun way to start, or even to practice your skills!