Tag Archives: group craft

Gifted2Give: T-Shirt Headbands

Another gift-able item we made at this year’s Gifted2Give was t-shirt headbands!  This was a new craft for 2016 and it was a HUGE hit.

Here are Kaye’s notes on prepping the materials for this craft:

  • From the t-shirts, cut strips at least 4 inches wide across the width of the shirt.
  • You can start at the hem, so you don’t need to cut that portion off.
  • I found that medium to large size shirts worked best.  Smalls were too tight unless paired with a strip from an extra-large shirt, and the extra large ones were too large, unless paired with a small.

And here’s how to put one together!

Take two t-shirt strips.  They can be the same color or different, coordinating colors.

019b9a87d809695560015cef2182a0c9f4641c198c (2)

Form each into a “V” shape, then interlock those Vs.

018df14ee126ac2f3a80da056cfff5669208ff5bd3 (2) 01ee5b90bfb0c01ca255b2f475ee8e9e2b62e74406 (2)

Bring the ends of one band together, and stitch an anchor stitch in each corner.  Repeat with the other band.

010540e335f0e514ec01418270f7f3a49c3054ed3e (2) 0109285a7121f7244ae85134051ead4fb75f10dfc8 (2)

Stretch the bands, if needed, to fit around the head.

01d1e725b89691e8ac8a04f0931e72c1bf0c77a029 (2)

Line up the ends of the bands and whip-stitch all four layers together, first in one direction, then in the other.

01b923237375be03594f085a35c21c57732d424a84 (2) 01b35f83d042e0abe0976658581ac3eaaa11991036 (2) 01559cc643a8454c93d7741a68110ea7083520ef86 (2) 010f7898205858571c7c39830f8ddbd055ad384592 (2)

Then pop it on, your headband is ready to wear!

01a82b5647c6ff6348755e1f166248c0b85e2ba63d (2)

This is another great gift that you can customize SO easily for your gift recipient.  Use their favorite color, or their favorite sport team colors, or make some in various holiday colors; there are just so many great options!

Did you make any gifts for the holidays this year?  Tell us about it in the comments!  We’re always looking for new ideas for the next Gifted2Give!

Gifted2Give: Cork Coasters

Every November we put on an event called Gifted2Give, an afternoon where participants can make holiday gifts for only the cost of materials.  It’s a fun day of crafting, music, snacks, and holiday cheer!

Here on the blog we’re going to be posting some of the crafts we’ve done at Gifted2Give over the years.  First up, cork-backed coasters!

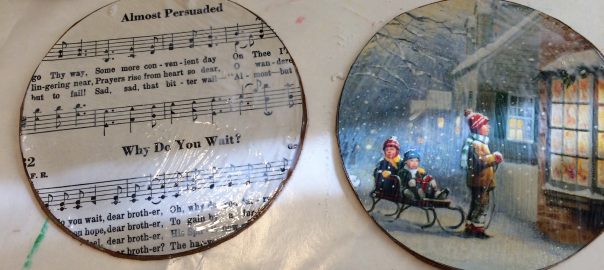
Coasters are best to gift in a set of 2 or 4.  You’ll need thin cork sheets for the back, and pretty maps, cards, or sheet music for the decorative tops of the coasters.

018230f2ebb373c2f890e852dc0e0641ff53d511ba-2

You’ll also need something circular that’s slightly larger than a large coffee mug to use as a template, some good scissors, and a good decoupaging glue like Mod Podge.

01e91f3aff408d29eb2e5c705d347d855a8d67a348-2
Matte or Glossy Mod Podge will both work. You’ll just have to pick what look you want!

Using your circular template (Kaye suggests that a plastic lemonade-mix container is a good size!), cut out circles of cork, and circles of your decorative top layer.

0170ab912d5af6f7a153cd5613a21ee9c05960896b-2

Kaye advised you can get sheets of cork at Lowes, both with and without a sticky backing.  We used the ones with a sticky backing because it’s so much easier to just peel off the paper and apply the decorative top layer, no additional glue needed (yet).

01d16425323119194464e57bfbdd5b3b8c5aafb113-4

After you’ve lined up your decorative top-layer on top of the cork backing, you’re ready to apply the decoupage glue to seal your coasters.

01e0574162a6cf39c72bd7f5a61fed15d41b37308e-2 0139bf31c4b78e4534aa0f4111bccf95d21fde8e38-2

You’ll need to apply a layer of Mod Podge, let that dry for about ten minutes, and then apply another layer.  Let the final layer of glue dry for at least 24-hours before packaging them up.  Tying up your set of coasters with raffia or ribbon is a nice, easy way to keep them together!

01d7141dd6a1ef7ba52ba8f245df13466390daab05-2

The best part of this gift is that you can so easily customize it to match what your gift recipient likes!  Sheet music for a music-lover, maps for a traveler, there’s no end to how you could make these for your loved ones.

Stay tuned for more Gifted2Give crafts, coming right up!

What We’re Making: Lunch Bag Turkeys

A Happy Belated Thanksgiving to you all!

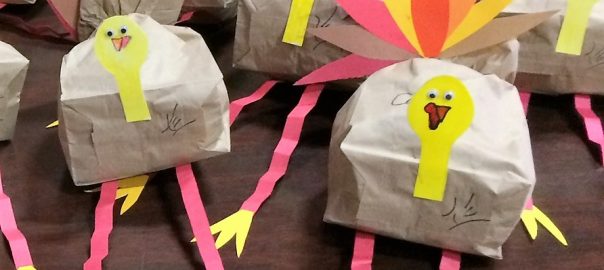
We made these fun turkeys out of brown paper lunch bags a few weeks ago.  They’re fun to make and then they can sit on a shelf or mantle bringing holiday cheer throughout the Thanksgiving season. 🙂

Here’s how to make them!

Start with a brown paper lunch bag and some newspaper.  Stuff the newspaper into the bag.

0191bf9ce13840dfdf5480f6bcefa82d792c5821d5-2 011fa0dbb58229159ac035231ee12efdf338881ff7-2

Twist the bag shut and secure it with a piece of chenille stem (you can cut them in half or even thirds to make the most of your resources).

01d5416e316135971d2cace212bb835e4aa0b81bfd-2

With scissors, cut the bag into strips from the edge to to the stem.

01ab8ae3ca8d68ded38373a76c748a3096942c1d47-2

Color your turkey head with colored pencils or markers.  Make sure to get the beak and waddle, and glue on some fun googly eyes.

01c25958cb15252bbcdc0d1fc76e30b905fd793ff8-2

Glue the turkey head to the bottom of bag, like so:

01193498ec645307cd13efc83e2ae90131607ce839-2

Glue some colorful tail feathers to the strips at the other end of the bag.

01484f1c7f1bb29f9b5778bc6d9182f629bb117aaf-2

Your turkey is almost done now!  It just needs legs!

01d06534be5e1a4a8d106fb50982ab1bce9b03141e-2

Accordion fold two strips of red paper, then glue on some turkey claws to the ends of the strips.
012382381d4b88179778dbfc210c923f45626b2cf8-2

Glue the end opposite the claws to the underside of the bag, under the turkey head.

0128529411fb223827ecb55e1d8b8c3459ef6a40a0-2

Now your turkey is ready to celebrate Thanksgiving with you!

012f3493dafdc9178ea2a877ebd3deec30ec27083f-2 019fd9a1b545f9dcc4992acb134947583e66d321b0-2 0117ac8579a7e739027d43b0c879d9480f9f42e394-2 010e2ab11122352182ef7a8a8bee608558d86ee1c0-2 01dee55e9d1c6dfd7ef07c36a31cf14772e4fe480a-2 01a8c221e55b84d8889af2b970084f53df97e199ab-2

Here’s to the Thanksgiving spirit lasting all year long!

What We’re Making: Paper Plate Owls

We made owls out of paper plates the other day, and look how fun and fall-like they turned out!

01a31d05edf9acabf6679ed2317d2c736bd08fafa7-2

Some tips from Kaye:

  • Tracing the fold lines on the plate’s back helped our folks with the logistics of the process.
  • I sorted the eyes, eye pupils, beaks, and talons (we provided a choice of color in all) into egg-carton sections for transport.
  • A stapler helped hold the folds in place for easier coloring.
  • In a room with a blank wall, it would be fun to craft a huge tree from brown wrapping paper and set the owls to roost.

Here’s the full how-to!

Draw the following fold-lines on the paper plates:

0107ca3996a667cea945abda7dd1686e6e093c169d-2

In the center of the plate draw rows of scalloped lines to be the owls chest feathers:

0186876d2d791113c5b2d44e92d6c786346d6156d1-2

Fold in the sides along the lines.

01c3330ff51f68c75f39bb41e6b5c67f991aa130b6-2

Color the wing feathers:

0142aac53fd886f7c3ede4b4dd2a480d89ffb6cd6e-2

Fold down the top part of the plate.  This will be the owl’s head.  Staple it to keep it in place.

01989cea944dd5927ed56dada223a8bbbb92b66132-2

Color the owl’s head.  You could make it match the wing feathers, or make it stand out.

0130150a58db38add9fb8fb4df5868a40ad32aa334-2

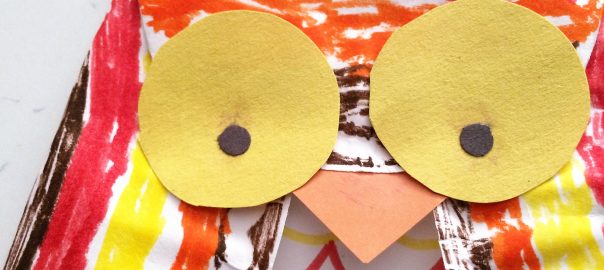
Make a pair of eyes for your owl by gluing small circles inside large ones.01f8bf482a0c11bae2285791f3d582a93ee75212fb-2

Glue the eyes onto the owl’s head.  Also glue on a beak.

017f1265cae830282125b85f9f124cfaf67b31a09c-2

Give your owl some talons.

017400eaddac9f4ebb0499fb969e4019bfca9c557f-2

And you’re finished!  What is your owl’s name?

01a31d05edf9acabf6679ed2317d2c736bd08fafa7-2


What We’re Making: Finger Puppets

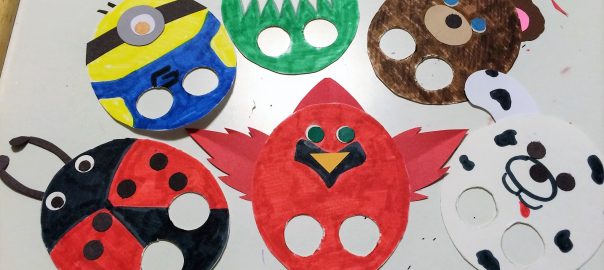
Our participants love making anything that transforms them; hats, masks, or these fun finger puppets are always winners.

01f30ee3aac9894caa2bc54afc82c1a7e0ca2b8882-2

These are especially great because they are so simple to prepare!

From some poster board, cut out an oval and 2 circles for finger holes–size these holes to the participants’ hands. To cut out the small holes, pierce the poster board with an Exact-o knife, then use fingernail-sized scissors to finish the job.  (This step may be best to do ahead, as the small scissors can be a little hard to maneuver.)

Then have the participants draw on their finger puppet to bring it to life!

011112f732807651d700eaa8301eb1a4c502d36b2f-2

You can also add other poster board decorations to the edges of the oval for a different effect.  For that you may want to provide templates for additions that might be challenging to draw (hats, wings, etc.), that way, participants have the option of tracing and cutting, or going rogue and doing whatever makes them grin.

0100eaa6ca8d5a488e847586409e8ccea21e7ffe57-2

Didn’t they make some neat puppets!?

01707bb43533cfc71924b3764c2baf9936205d20c3-2 01c83121ba7adcd2713d6dec3027230b470749c61c-2 01353db62d30acd990dbba23d90e6ae6f147805368-2 012683fd07472c87073739a1bbc27cd4ea982c8f75-2 015605d2af4facdd982c0e3876a7465540cc09f8b6-2

Here’s to transformative art!

Young Artists Club: Frida Kahlo

Our club members loved learning about Frida Kahlo!

We combined learning about Frida Kahlo with some Dia de los Muertos activities.  We decorated sugar skulls:

img_8613-2 img_8619-2 img_8620-2 img_8621-3 img_8622-2 img_8626-2

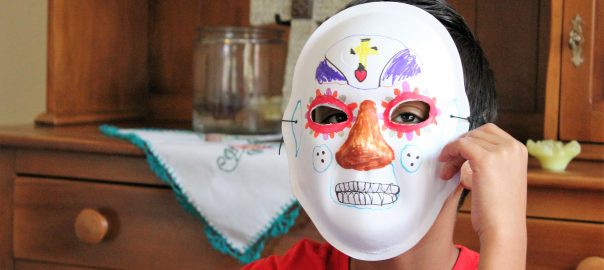
made Dia de los Muertos masks:

img_8612-2 img_8615-2 img_8616-2 img_8617-2

and made altars to our loved ones who’ve passed:

img_8623-2 img_8624-2 img_8627-2 img_8628-2

It’s hard to do our Young Artist’s Club justice with just pictures and a description; if you’re in Austin and in First Grade or older you’re welcome to join us!  Call Kaye at 512-807-6863 to enroll.

Did you celebrate Day of the Dead?  Send us pictures if you did, we’d love to see!

Young Artists Club: Alexander Calder

Alexander Calder might have been a lesser known name among our club members, but what a body of work to explore!  Mobiles and wire sculptures and the circus, oh my!

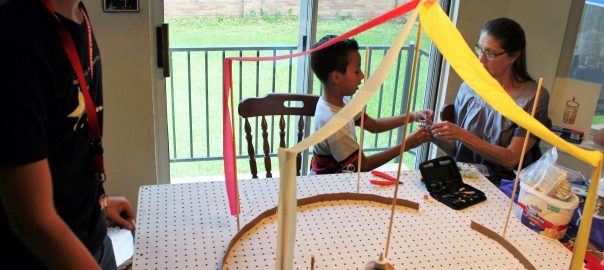
Though we discussed many of the various mediums in which Calder worked, we primarily focused our hands-on time making wire sculptures, stabiles*, and collaborating on a wire circus of our own!  Check them out:

(This wire sculpture got a little out of focus, oops!)

img_8604-2 img_8605-2

A stabile!
A stabile!

If you’re interested in learning more about Calder, I found this site particularly good as an overview of his life and work, and this site has a nice photobiography section to look through.

The circus our club members created will be on display during Gifted2Give on November 13th here in Austin!  Come see it in person, and make some holiday gifts while you’re there!


*Which was an art term I myself had never heard of!  It was used to describe a period when Calder was making stationary sculptures, as opposed to his period of making mobiles.  It was neat to learn this alongside our club members!


What We’re Making: Fish in Motion

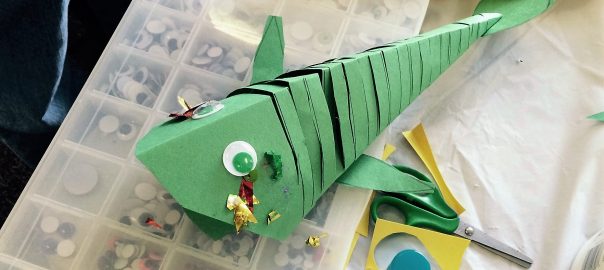
Don’t these moving fish look neat!?

01f256fad430f97c8156fd8a0e681041e850d4139f-2

Kaye found the instructions for these here, just follow the link for their excellent walk-through!  There’s a definite origami feel to the first few steps (folding the paper to make it a square, making further folds and then unfolding).  Once you get to cutting you may need to assist participants with not cutting too far into the paper.  Kaye said she also provided templates for the lower jaw, back fin, and side fins for those who wanted to use them.

01d4d5ba990aaae8ef5dd475083cb45e933da16d7f-2

01fcc117da75a16b11a43205d822450413a1f01a5d-2

This was a really fun papercraft, taking something solid and making it move.

01a7e4c86404cf80ad85a32712dfe4352fc93e6c27-2 01f075ac1c4689e5ce7dde189453ea9ba83f444637-2

I think these would be really cool to hang on the wall next to some watercolor jellyfish!

Happy creating, all!

What We’re Making: Silly Faces Books

Did you have one of those “Learn to Draw Cartoons” books growing up?  I remember my brother had one and loved it.  (Incidentally, he works as an artist for video games now!)

01b93e6ef7b8523d3b2a67821c68e29afbc6b09f12-2

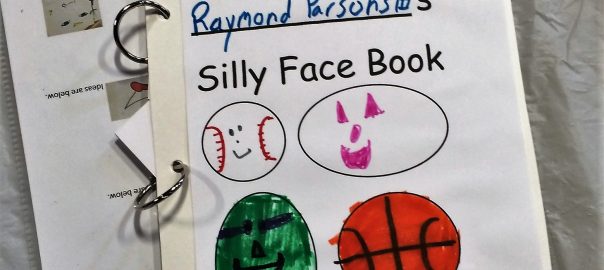
Earlier this month Kaye pre-made these wonderful Silly Faces books for our participants to draw in and on.  It was just a simple front cover of posterboard, three internal pages cut horizontally into thirds, and a back cover of posterboard.  She said they would really work best if you have a binding machine; we used binder rings, which worked well enough, but the pages dangled a bit.

0188be7ae294d73716018dafb7f5906eddced13860-2 0192859e5157bf29ca9852d9b004fa62bc2538fa25-2

Kaye put examples of different cartoon eyes, noses, and mouths out on the tables for participants to reference.  Then she instructed them to open their books, and draw what ever eyes, nose, and mouth they wanted on their first page.  Then they all turned those strips to the next page and drew another set of eyes, nose, and mouth.  Finally they drew more features on the last page of their books.

01c96fe8fe1b67514fb66cc1666b9af9899ed987dd-2 013753879f70f6a4dce5c85193f9a431b3b7c5c022-2 01244e8255a974fe8479de80d2c3b5cc49192c83d3-2

Of course the point of cutting the pages horizontally is to mix and match the faces around in fun ways!  Our participants loved changing up the faces, as well as learning simple cartooning techniques.

0152a261972297c81bae5e0110bda816e720c32c02-2 01101727ec26b1f24f12e35bc7c9e836328ad6a3d2-2

This is one of those nice activities, too, that participants can really add to after our initial art period.  They could decorate the covers, or add more face pages!

012b0eeab0333c8ead6dc82b8b1c5d2bf8ef82d64e-2 01e9550887122942b26e20d9ad7b5dde02aedc4871-2

Have you ever tried drawing cartoon faces?  A book like this would be a fun way to start, or even to practice your skills!

What We’re Making: Foil Designs

Oooooo, shiny!

01a744d1fe34c5f4a71fdca33f636bcc569995a29d (2)

What a fun take on tangle art*.  The 3D nature of the yarn and the sheen from the aluminum foil really makes these stand out!

Here’s how to go about making your own foil designs!

You will need:

  • pieces of posterboard, size 10″x12″ (color doesn’t matter, as you’ll be covering it all in foil)
  • yarn that can stretch across your posterboard (again, color doesn’t matter since it will get covered in foil)
  • scissors to cut the posterboard and yarn
  • glue sticks or liquid glue (liquid glue would be better if your group is small enough to supervise thusly; we used glue sticks for our larger groups)
  • pieces of aluminum foil, size 12″x14″
  • Sharpies of many colors (use the regular tip Sharpies; the fine tip ones tend to tear the foil)

Decide how you’d like your yarn lines to criss-cross your posterboard, then glue them in place.  Let the yarn hang over the edges of the posterboard.

01f5417927fbc2c7aba62996126199a9bcaa437bbd (2)

Once your yarn is glued down, cut the extra yarn from around the edges.

018830779dd66b6a34fb9b0ea2d289a4c8cd4d4121 (2)

Then, lay a piece of aluminum foil on top.

0157b8f8b4e04786959c8c8f34ad05e26556c167f7 (2)

Gently start smoothing the foil over and around the yarn, so that you start to see the outlines against the smooth posterboard.

014d5f44c2fc2a166828d2a007cf03d451f4c1fbcd (2)

Once it’s totally smoothed out, you should have very clear outlines; it will look something like this!

01fb9815b9294eea7f1cec81a835af4ec301222096 (2)

Fold the foil around the edges to keep it in place.

01e84e873cf415af8c8dd8fafb8fea9232dc12fbd5 (2)

Now you’re ready to color!  You can do some solid-colored sections:

0160e29633e094d8acd2c1545a94f39228c95d2da8 (2)

But also try some patterned sections!

016488ec145015aa1b5ef5168daf98e150e878bc87 (2)

And keep coloring until you’re happy with the results!

01a744d1fe34c5f4a71fdca33f636bcc569995a29d (2)

Check out some that our participants made!

01bef3e745748baf6d84f465ba4a9bfc23493bbe14 (2) 014127bf43c4fa5e7690a7045f46b2b88426fb4b91 (2) 014764490df7566c4c3a04ac862a278670409298f9 (2) 01fec50ff23dde7cba10af83bc6dd7f165d358e7a6 (2) 01051bca50bb2991dfe01efd3e16166338e6912268 (2) 013a2a5d5260254f676f5037b0c92bb6a029c9757e (2) 01f19780d27106fc6f5a6f8f6e35a9629d67d05bdf (2) 01ef7464caeae66f7c6cf981ed5622e939e16c1282 (2) 01e1d937458194042a29e38c6fbdb02f74dbc9fbfb (2) 01b220d37a1af2ad915745231c9c7a70b99e19fed7 (2)

(On the bottom right there you can see that, if you happen to tear the foil, no worries, just tape it back together!  We only had matte tape, but if you’ve got a shinier tape it’ll blend in all the more.)

I love the combination of all of the colors and patterns.  And I love that these are made with materials so many of us already have in our houses!  Send us pictures if you give this one a try.


*Not familiar with tangle art?  Here’s a good Psychology Today article about it.